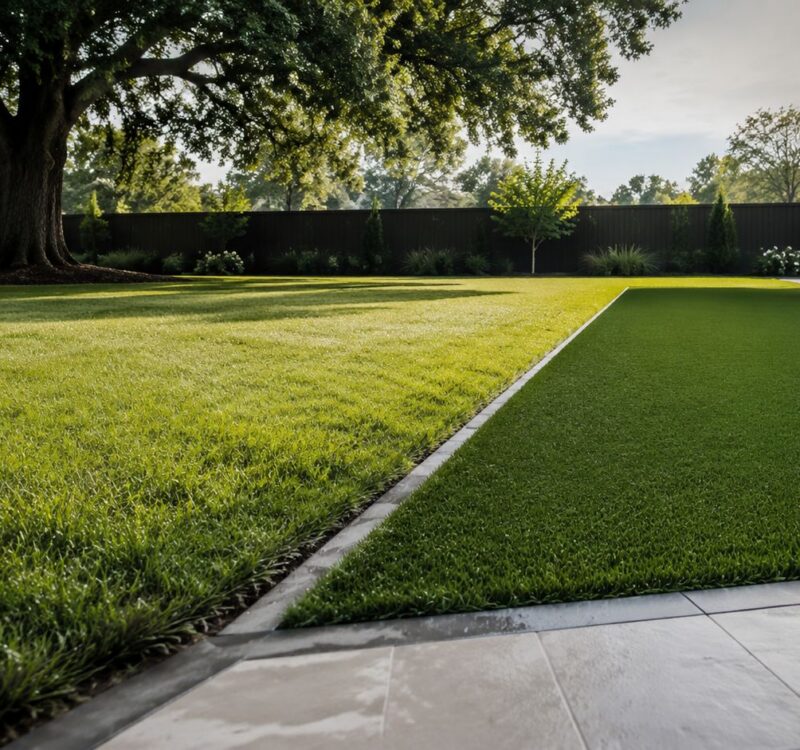
You're probably standing in the yard after a hard DFW rain, staring at water that shouldn't be there. Maybe it's collecting beside the driveway, running toward the foundation, or sitting in a low spot that turns into mud every time the weather flips fast. That's the point where permeable paver installation stops being a design idea and becomes a drainage decision.
In North Texas, the hard part isn't the pavers themselves. It's matching the system to expansive clay, steep runoff patterns, and a site that may not want to absorb water the way a generic brochure suggests. A permeable surface can work very well here, but only when the base, slope, and soil are treated as one system instead of separate pieces.
Planning Your Permeable Paver Project in North Texas
DFW sites punish sloppy planning. A driveway on clay that looks fine during dry weather can fail the first time a storm dumps water faster than the subgrade can accept it, and that's why the project has to start with the soil, not the catalog. Recent North Texas guidance is blunt about this point, permeable pavers reduce pooling only if the base, slope, and native soil are matched to the site Reading, MA permeable paving guide.
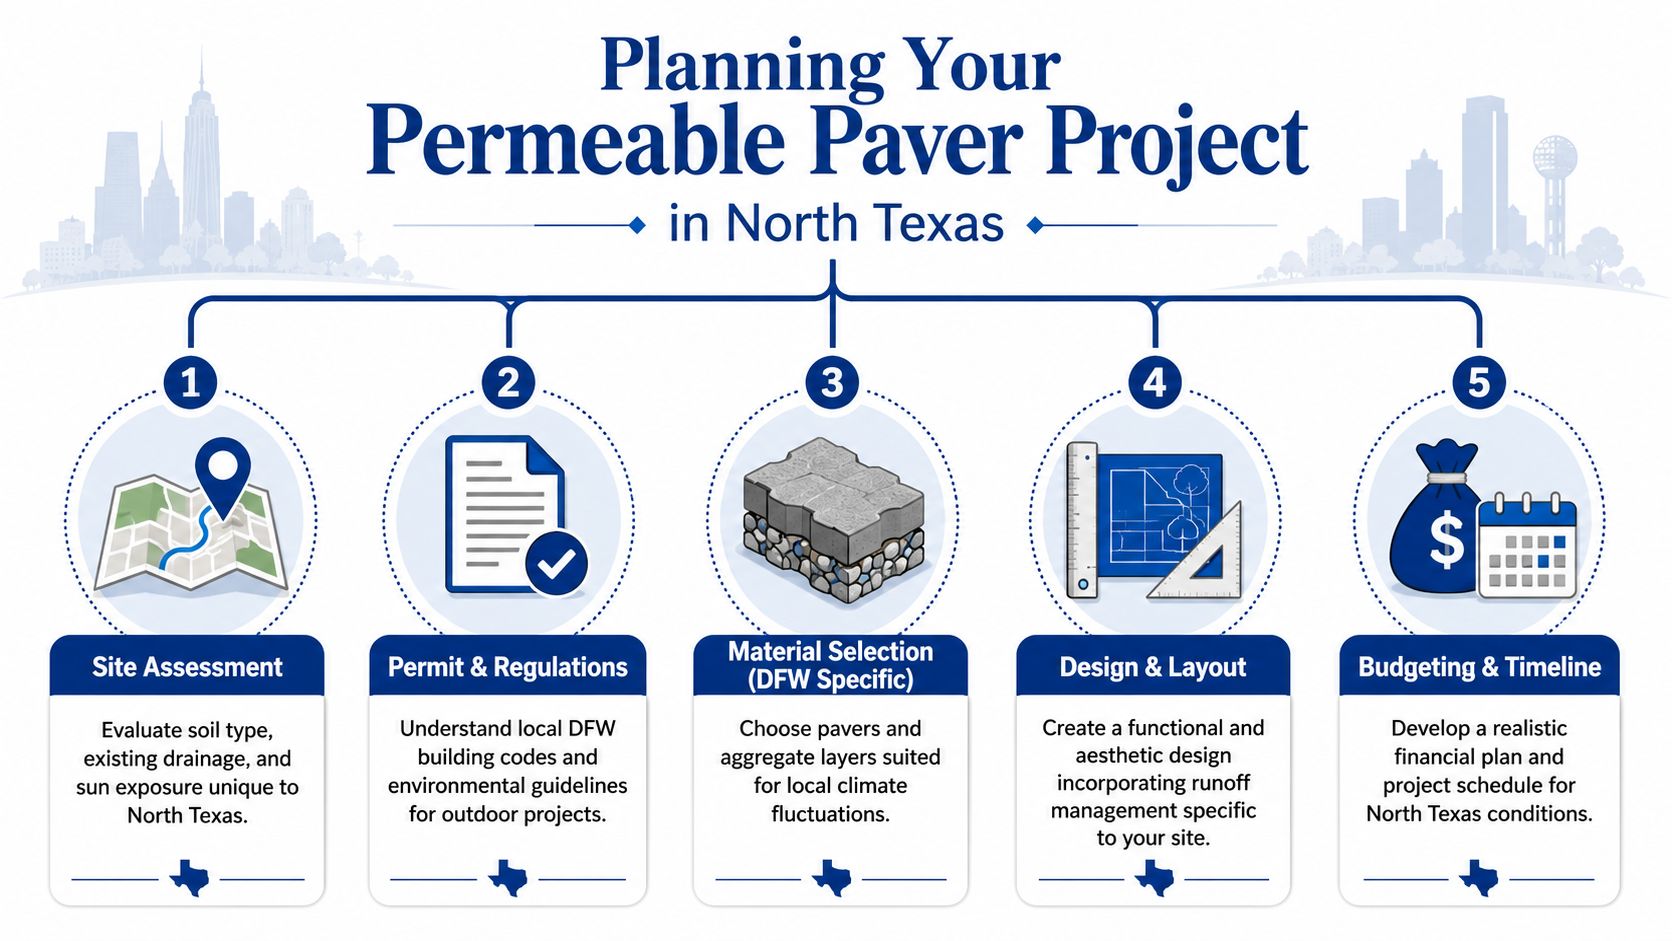
A good plan starts with a simple question, what are you trying to solve? If the goal is to reduce splash and surface runoff near a patio, the design can be simpler than a full driveway retrofit. If the goal is to keep water away from a foundation or reclaim a chronically wet side yard, the system needs more deliberate drainage logic, and in some cases the answer is not full infiltration at all.
Site conditions drive the design
A site walk should look at the slope, where water already moves, and what the surrounding hardscape is doing. The practical issue in DFW is that clay soils often hold water near the surface longer than a homeowner expects, so the native subgrade matters as much as the decorative surface. That's where a drainage-minded contractor can tell the difference between a surface that merely looks permeable and one that effectively manages runoff.
Practical rule: if water already wants to move toward the house, don't assume a permeable surface will magically fix the path. The design has to redirect, store, and release water in the right order.
Utility marking matters too, because excavation depth and base design can change fast once gas, irrigation, lighting, or drainage lines are located. If the site already has drainage problems, it helps to review yard drainage fixes from Rosewood Landscape Group before deciding where the permeable area belongs.
Decide how much infiltration you actually want
Not every DFW project should try to send water straight into the soil. On a lot with heavy clay or sensitivity near a foundation, the safer design may be partial infiltration or an underdrained build that stores water and releases it in a controlled way. That's a design choice, not a compromise.
The core idea is simple. Full infiltration works only where the subgrade accepts it. Partial infiltration works where you want capture and slower release. If the soil won't cooperate, the system should be designed to manage water without forcing it into a bad location.
Choosing the Right Materials for DFW Conditions
The surface matters, but the layers below it matter more. In a permeable paver installation, the paver block, base stone, bedding course, and jointing aggregate all have separate jobs, and the wrong material in any one of those layers can choke the system. Traditional sand has no place in a permeable joint because it fills the voids you're trying to preserve.
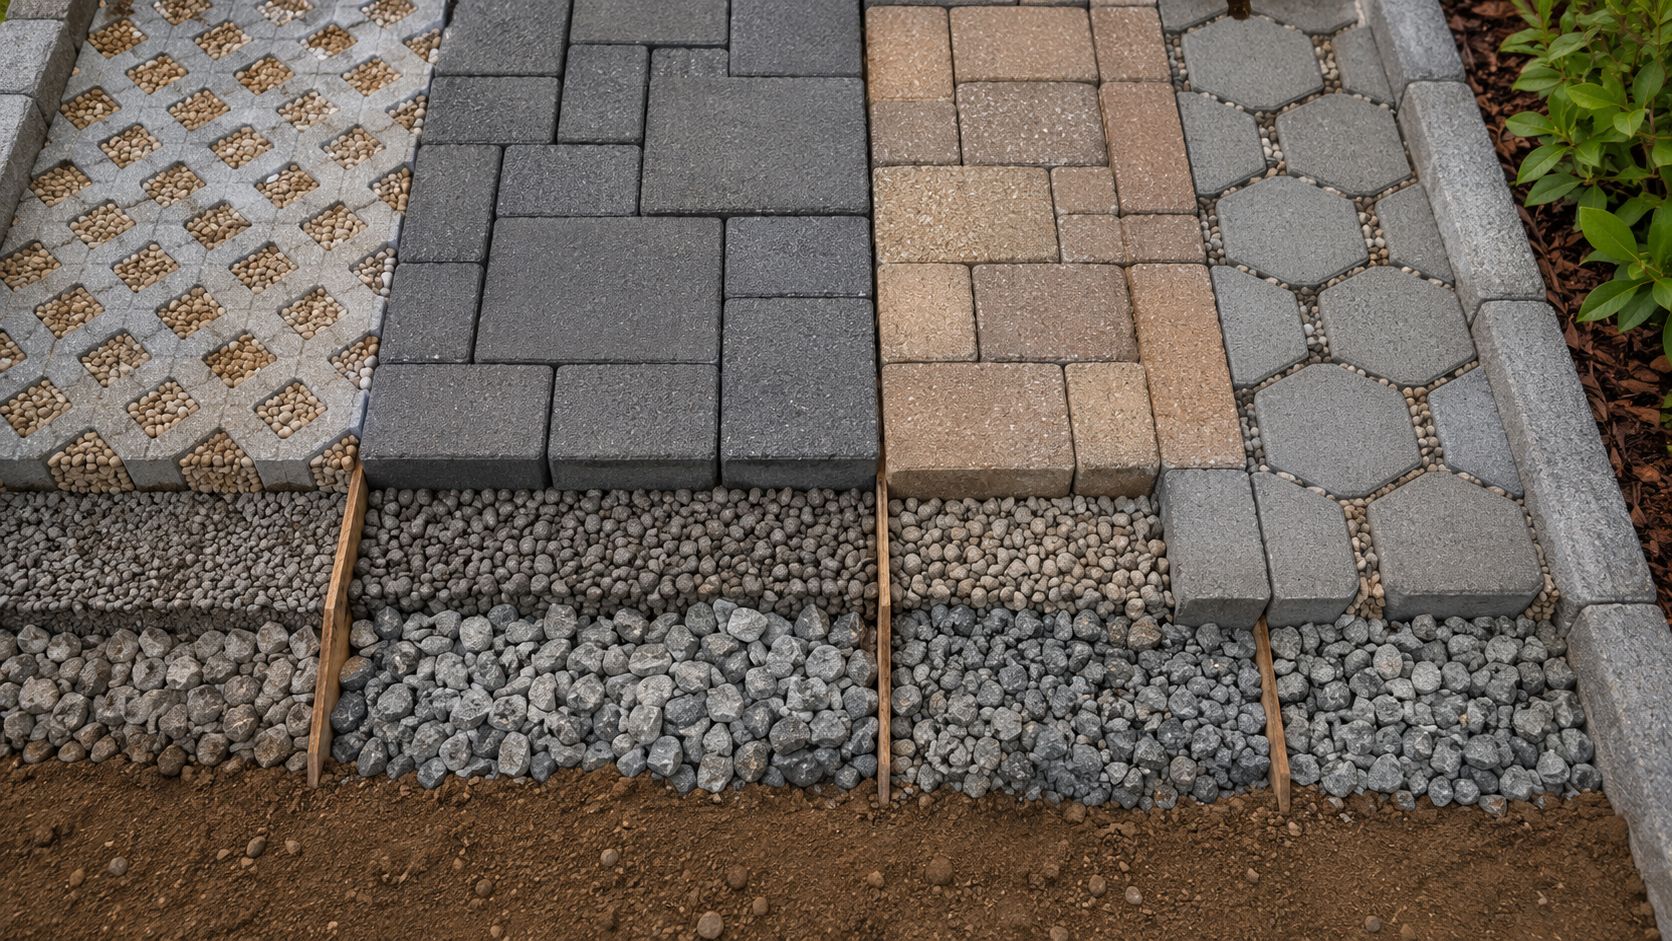
For the visible surface, concrete permeable pavers are common because they're predictable and widely available. The important choice is less about appearance alone and more about whether the product can be paired with the right open-graded stone underneath it. On a residential drive, durability and maintenance access usually matter more than exotic finishes.
Compare the layers before you price the job
| Layer | Function | Recommended Material | DFW Consideration |
|---|---|---|---|
| Pavers | Surface load support and appearance | Permeable concrete pavers | Choose a style that can be set cleanly with tight layout control |
| Base | Stores water and carries load | Open-graded crushed aggregate | Needs enough void space to handle fast storm runoff |
| Bedding | Seats the pavers evenly | 1/4 in #10 aggregate | Must stay porous and not be overcompacted |
| Joints | Locks the system together and lets water pass | 2–6 mm open-graded crushed rock | Never use sand, because it can block infiltration |
That table is the part many homeowners skip, then regret later. DFW projects need the base to do two jobs at once, support the load and store stormwater. That's why clean, angular aggregate is essential, and why the bedding and jointing material can't be chosen by habit.
Match the material to the site, not the other way around
A patio with low vehicle traffic gives you more flexibility than a driveway that sees daily turning loads. But the soil still controls the design. On a site with erosion risk or runoff crossing the edge of the install, it's smart to look at erosion control landscaping solutions alongside the paving design so the water doesn't move the problem downhill.
Sand is cheap, but it's the wrong material for a permeable system. Once fine material migrates into the joints or bedding, the drainage path narrows and the surface starts acting like a conventional paver field.
The Permeable Paver Installation Process From Start to Finish
A clean install starts below grade, before a single paver is set. The crew first checks infiltration and marks utility locations, then excavates to the combined depth of the paver, bedding, and subbase. In North Texas, that first inspection matters because clay soils can hold water longer than expected, and a spot that looks fine on the surface can fail once summer storms hit.
A field guide recommends 400 mm square test holes for every 20 to 25 m², filled and drained overnight, repeated three times. If the water does not drain, the subgrade is not suitable for a Type A permeable system.
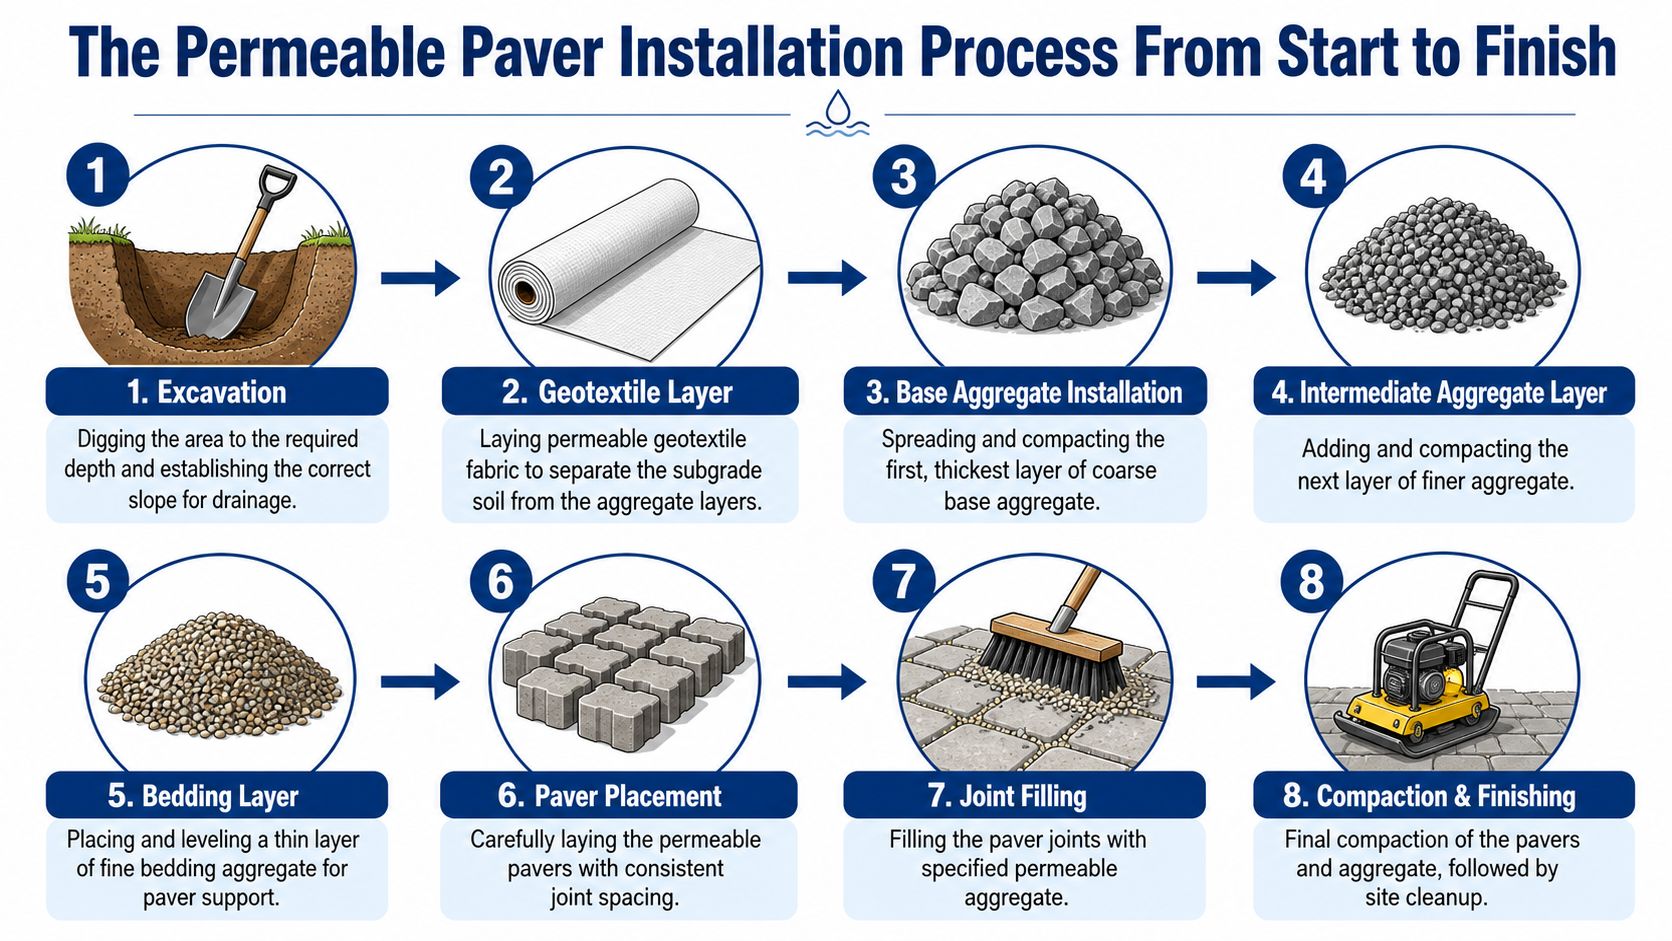
The excavation has to stay square, level, and true to the existing grade. If the site slopes too much or sheds water the wrong way, the base design has to correct for that. Around DFW, sudden rainfall exposes grading problems fast, so a slightly off excavation can become a standing water issue before the job is even finished.
Build the base in controlled lifts
After excavation, a non-woven geotextile goes on the subgrade and up the sides. Then the open-graded aggregate base is placed in 150 mm, or 6 in, lifts and compacted carefully to preserve the target 30% void ratio. That void space lets the base store water without turning into a muddy layer that blocks infiltration.
The bedding layer needs the same discipline. A manufacturer guide recommends a 1 to 1.5 in bedding layer of 1/4 in #10 aggregate that is not compacted before paver placement. If the bedding gets crushed or contaminated with fines, the pavers may still look level, but the drainage path suffers and the whole system loses performance.
Set the pavers with layout control
The surface should follow snapped lines, straight edges, and consistent joints. One technical benchmark calls for 6 mm joint widths filled with 2 to 6 mm open-graded crushed rock, never sand. That joint size keeps the field locked together while still letting water move through.
A good crew checks every few rows for drift. Once a pattern starts to wander, the correction shows across the whole surface, and that is hard to hide on a driveway or front walk. The best installs look calm because the control work happened early. If edging is still being selected, landscape edging options from Rosewood Landscape Group should be matched to the load and edge condition before the surface is set.
Edge Restraints Compaction and Final Jointing
Permeable paver work looks finished before it reaches its final state. In DFW, that is the moment where a surface either holds together through hard rain and shifting clay, or starts to drift, open up, and settle at the edges. A proper restraint, whether concrete, heavy-duty plastic, or another approved system, needs to be installed before the final compaction step, and edging options from Rosewood Landscape Group should be matched to the load and the edge condition, not picked just because they are easy to install.
Compaction has to stay controlled. Use the right plate compactor for the paver system and make the passes carefully so the field seats without spreading sideways. Keep the machine off any edge that has not been locked in place, especially on driveways and curved walks where North Texas subgrades can shift after a storm.
Once the perimeter is stable, the joints get filled in stages. Sweep in the open-graded aggregate, compact it, then top off the joints until the rock settles just below the surface of the pavers. That finish leaves the joints packed enough to hold the field together while still letting water move through.
The restraint choice matters as much as the compaction. A weak edge on expansive clay will move first, and once the border creeps, the pavers near it usually follow. That is why the edge detail has to match the shape of the layout and the expected traffic, especially where runoff concentrates after intense rainfall.
Testing Maintenance and Long-Term Care
Once the surface is in, test it. Pour water across a few representative spots and watch whether it disappears through the joints and drains as expected. A permeable system that holds water on the top longer than it should is telling you something about the base, the joints, or the site conditions.
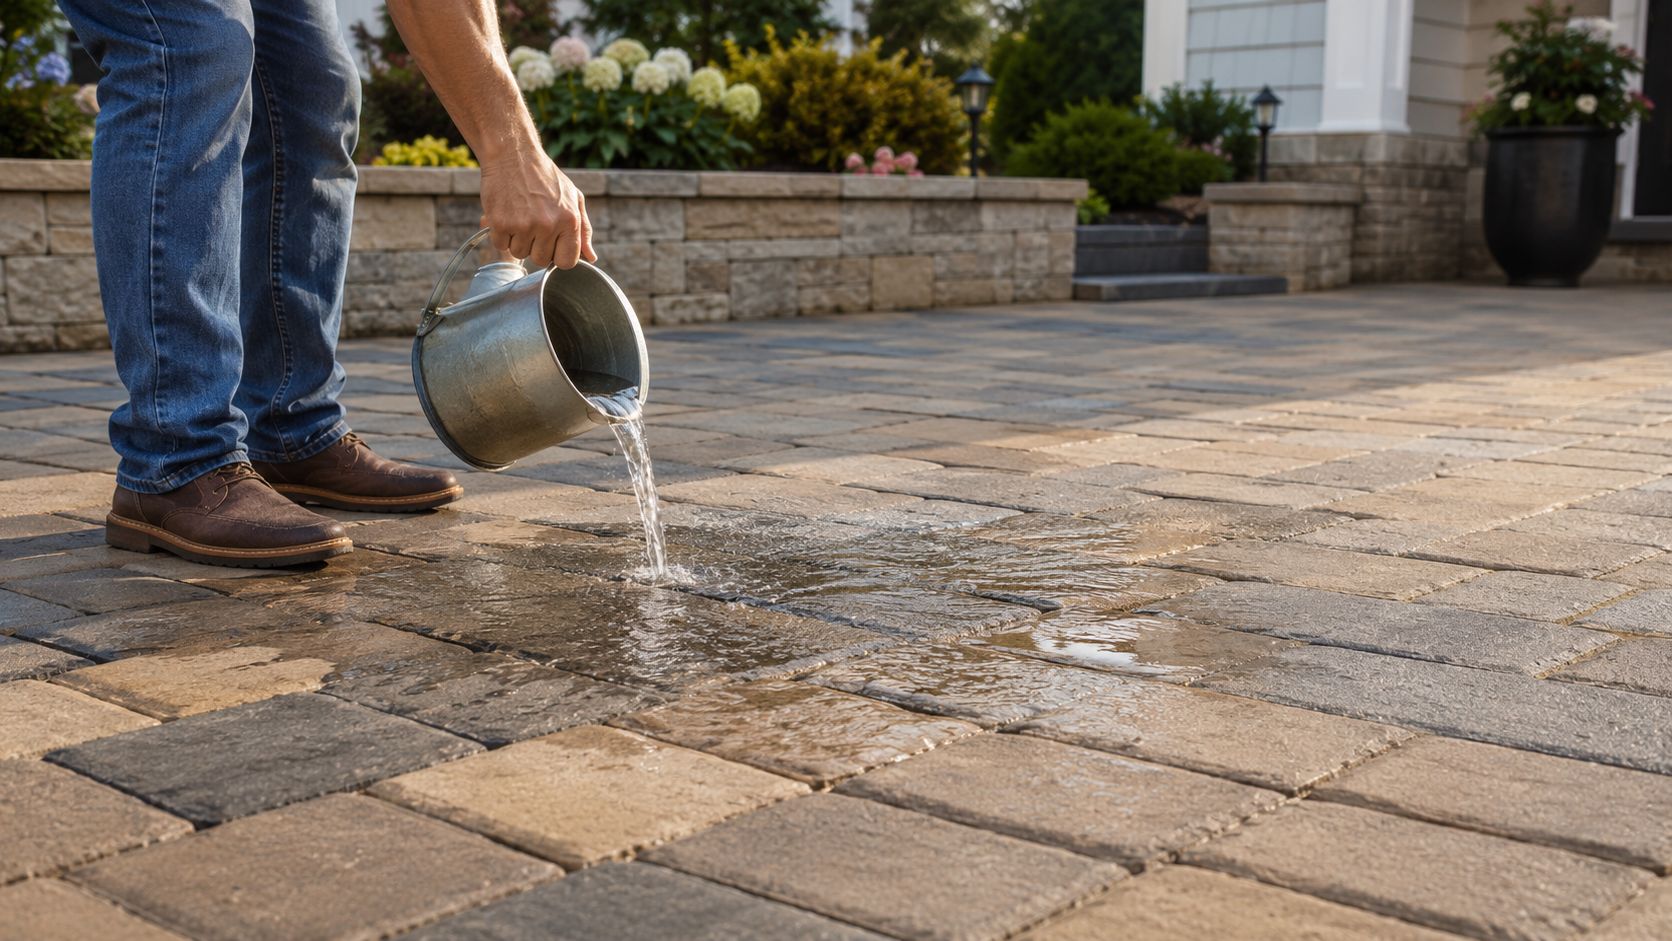
Routine care is simple, but it has to stay routine. Keep leaves, soil, and grass clippings out of the joints, because organic debris is what slowly turns a draining surface into a clogged one. Use a broom or light blower, not aggressive cleaning that drives fines deeper into the voids.
Keep the surface open
A pressure washer can be the wrong tool if it strips out joint stone or forces material deeper into the system. Hand cleaning and periodic inspection do more for performance than aggressive washing on most residential installs. If the joints have settled or the surface looks dirty, add the correct open-graded aggregate back into the gaps rather than patching over the problem.
The maintenance mindset should be the same as irrigation or drainage care, small checks prevent expensive fixes. A permeable surface is a functioning water-management layer, not a decorative topping. If it's treated that way, it keeps doing its job.
Practical rule: if you can see fines building up, don't wait until the next major storm to react. Clear it early, before the joints lose capacity.
Costs Permits and When to Hire a Professional
In DFW, the first cost question is usually not the paver itself. It is whether the site can handle the water that hits it. Permeable paver systems are priced as drainage assemblies, with excavation, base prep, materials, and finishing all built into the job. The U.S. EPA reports typical installed costs for permeable pavers at $7 to $14 per square foot.
Slope changes the design quickly. Permeable systems work best on 0% to 2% slope, and they can be engineered up to about 15%, but once slope goes past 12%, extra design measures may be needed. On 3% to 5% slopes, flow dams are recommended to slow runoff and add storage capacity, which matters on North Texas properties where sudden rain can push water harder than the base can absorb if the layout is too simple.
Clay soil is the other major cost driver here. Expansive subgrades can hold water, heave, and settle unevenly, so a project that looks straightforward on paper may need more excavation, better restraint, or a revised drainage path once the site is opened up.
Know when the project needs a pro
A DIY install can work for a small, flat patio with open access and a stable subgrade. It becomes a bad bet when the work is close to a foundation, crosses a steep grade, or sits on clay that drains slowly. At that point, the design has to handle runoff path, storage, restraint, and soil movement together, not one at a time.
Permits can come into play any time the project changes grading or drainage, especially on larger driveways or a hardscape rebuild. Check local requirements before excavation starts. A drainage system installed without the right approvals can create a bigger problem than the one it was meant to solve, especially after a hard DFW storm.
For homeowners who want one contractor to manage drainage and hardscaping together, Rosewood Landscape Group is one option in the DFW market that handles drainage, hardscaping, and site planning as part of a broader outdoor area service. That matters when the permeable surface is part of a larger property fix instead of a standalone patio.
If you are dealing with clay soil, fast runoff, or water near the house, do not guess at the design. Call Rosewood Group, walk the site with a project manager, and get a permeable paver plan that fits your grade, your soil, and the way North Texas storms hit your property.
Related posts
8 Best Shrubs for North Texas Landscapes in 2026
Zoysia Grass Fungus: Identify, Treat & Prevent in 2026
How to Improve Soil Quality: Easy Ways to Improve Soil
Take All Root Rot: Diagnose & Treat Your Lawn