
Late August in Dallas-Fort Worth exposes every weakness in a lawn. Bermuda thins out near the driveway, shaded spots stay muddy longer than they should, and the strip along the fence turns into a tired mix of weeds, bare dirt, and stressed grass. Most homeowners who call about turf aren't chasing a trendy upgrade. They're tired of pouring time and money into a yard that never looks finished for long.
Artificial turf makes sense here for practical reasons. North Texas heat is relentless, clay soil shifts, and stormwater doesn't forgive sloppy grading. A clean-looking turf lawn isn't just about the grass product you pick. It comes from the install underneath it. If the base is weak, the lawn won't stay smooth. If drainage is wrong, water collects where you least want it. If seams are rushed, the whole project looks off no matter how good the turf itself is.
The artificial turf installation steps that matter most happen before the lawn looks like anything at all. Homeowners usually focus on color, blade shape, and softness. Installers focus on excavation depth, sub-base compaction, seam direction, perimeter restraint, and finish grooming. That's the difference between a yard that still looks sharp after hot summers and one that starts telegraphing mistakes early.
Your Guide to a Flawless DFW Turf Installation
A lot of DFW turf projects start with the same complaint. The homeowner is done fighting a lawn that looks patchy by summer, soggy after storms, and uneven year-round because the soil underneath keeps moving. In North Texas, that combination is common. Expansive clay swells when it holds moisture, shrinks when it dries out, and puts pressure on anything installed without a stable base.
That's why good turf work never starts with rolling out synthetic grass. It starts with the dirt. The lawn you see at the end is really the result of excavation, grading, compaction, and finish detail done correctly.
What homeowners usually notice first
The visible problems are usually observed:
- Brown or thinning turfgrass near sidewalks, fences, and high-heat areas
- Low spots that stay wet longer than the rest of the yard
- Mud tracked indoors after rain
- A constant maintenance cycle of mowing, edging, reseeding, fertilizing, and watering
Those surface issues often point to deeper site conditions. In DFW, the soil and drainage pattern are usually part of the conversation, not a side note.
Practical rule: If a natural lawn struggles in the same spots every season, don't assume turf alone fixes it. The site still needs proper grading and a stable base.
What a proper install changes
When the installation is done right, artificial turf gives you a surface that stays visually consistent through summer heat, handles foot traffic better than a stressed natural lawn, and drains the way the yard was designed to drain. The keyword there is designed.
Homeowners sometimes think of turf as a giant outdoor rug. It isn't. Modern installations are built as layered systems. The excavation has to create room for the base. The base has to be compacted evenly. The turf layout has to account for pile direction. The seams and edges have to stay put in heat and daily use.
At Rosewood Group, that's the part of the project we pay the most attention to because North Texas punishes shortcuts fast. A rushed install might look acceptable on day one. After heat, rain, and a few months of use, the weak points start showing.
What works and what doesn't in North Texas
A few trade-offs are specific to this region:
| Condition | What works | What doesn't |
|---|---|---|
| Expansive clay soil | Stable, compacted aggregate base | Turf laid over loosely prepared soil |
| Intense sun and heat | Clean seam work and secure edges | Perimeters that are lightly pinned and left to move |
| Heavy rain events | Thoughtful grading and drainage planning | Flat installs with no runoff strategy |
If you're considering a DIY project, understanding these artificial turf installation steps upfront will save a lot of frustration. If you're hiring a contractor, these are the same details worth asking about before anyone starts tearing up the yard.
Pre-Installation Planning and Site Assessment
The cleanest turf projects are usually the ones that looked boring at the start. Before demolition, the site needs to be measured, checked, and thought through like a construction project, not a weekend yard refresh.
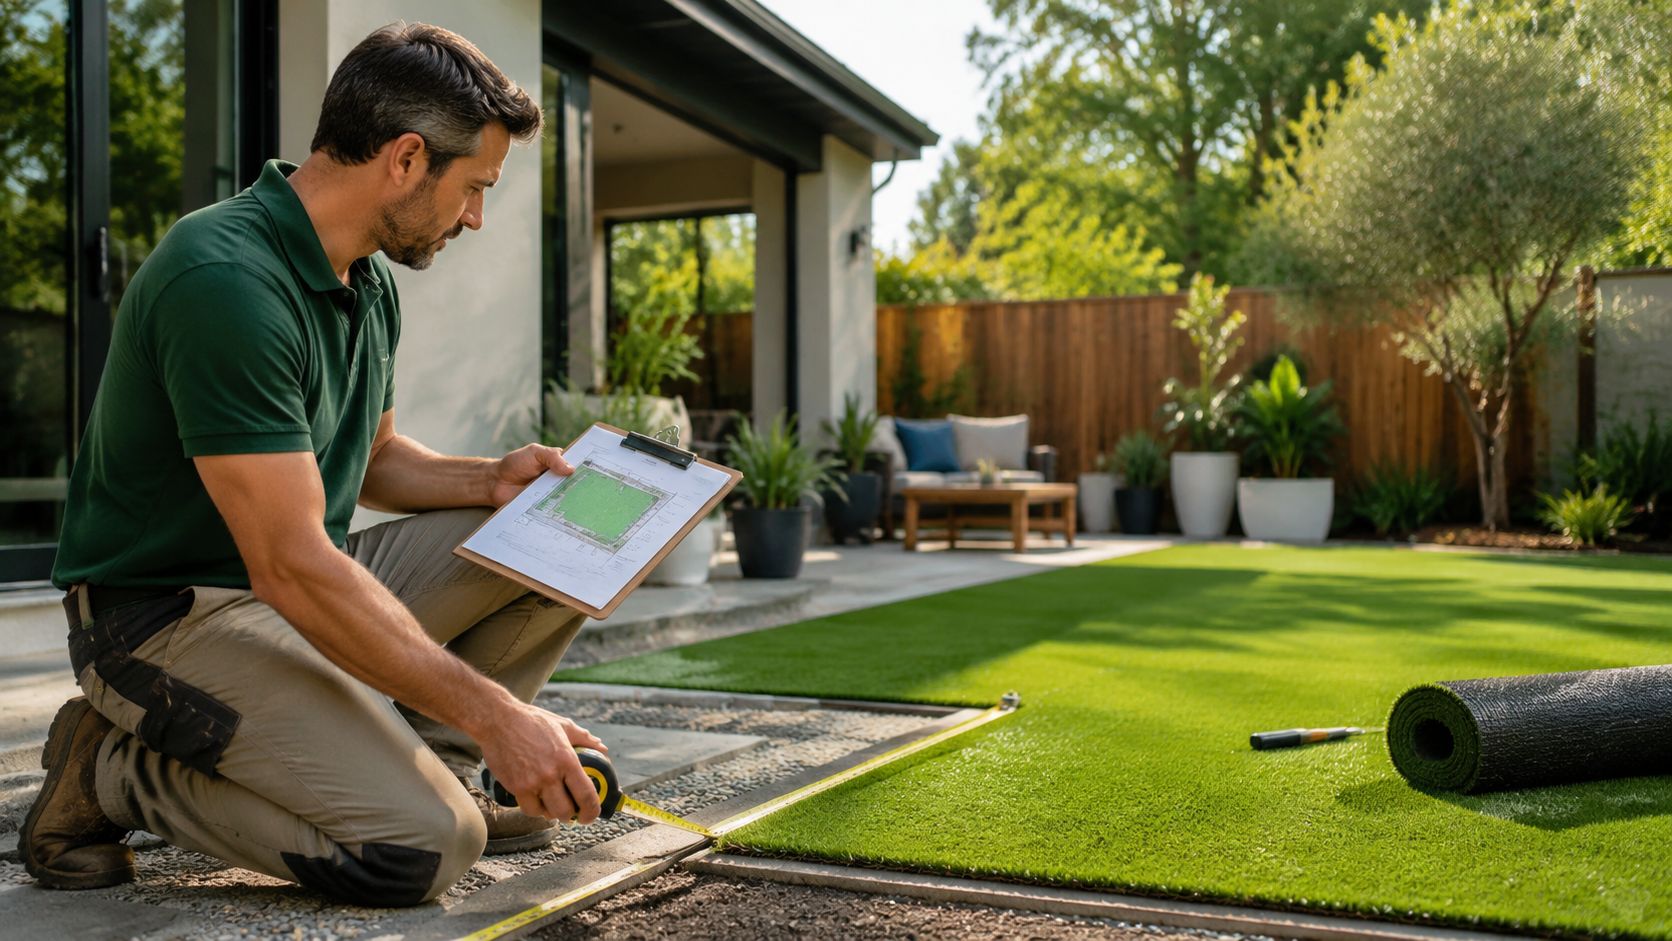
Measure the space like an installer
Don't eyeball it. Measure the full footprint, then note curves, bed lines, utility boxes, cleanouts, AC pads, downspouts, and any hardscape the turf will meet. Turf comes in rolls, so layout affects seams, waste, and how natural the final surface looks.
In practice, the usable shape matters more than the property listing square footage. A narrow side yard with utility interruptions installs differently than a broad backyard rectangle. If you're comparing budgets, a breakdown of turf installation cost per square foot helps frame why site complexity changes labor and material needs.
Call before anyone digs
Utility verification comes first. Call 811 and have underground utilities marked before excavation starts. That includes irrigation lines, electrical runs, cable, gas, and anything a previous owner may have added without obvious surface clues.
In older DFW neighborhoods, buried surprises are common. We've seen edging spikes hit lines, and we've seen sprinkler systems mapped inaccurately from earlier remodels. A turf project is much easier to adjust on paper than after damage underground.
Check approvals before material arrives
Artificial turf can trigger review requirements depending on the neighborhood. Some HOAs care about visible street-facing applications, edging style, color, sheen, or whether the installation meets hardscape cleanly. Cities may also have rules that touch drainage, setbacks, or work around utilities and easements.
A few things to confirm early:
- HOA review standards for front-yard visibility, border treatments, and approved materials
- City requirements if the work changes drainage patterns or affects easements
- Access constraints such as alley loading, side-yard gate width, or staged material delivery
A good site assessment catches paperwork problems before they become demolition problems.
Read the drainage before you change the surface
This matters more in North Texas than many homeowners expect. Turf itself isn't a grading fix. If the yard already sends water toward the house, a new synthetic surface won't magically correct that. The base, edge elevations, and runoff path still need to work together.
Walk the yard after a storm if you can. Watch where water gathers, where soil erodes, and which fence lines trap runoff. In clay-heavy lots, pooling may appear even when the lawn looks flat because the water has nowhere to move once the surface seals up from compaction and foot traffic.
Decide where turf should stop
Not every inch of a yard needs synthetic grass. Sometimes the better result is turf in the usable play or lounge area, with planting beds, gravel bands, or edging handling transitions along fences and foundations. That gives the install a finished look and avoids awkward cuts around every obstacle.
A smart plan makes the build easier. More important, it prevents expensive rework after the crew has already started moving soil.
Demolition and Building the Sub-Base
A lot of DFW turf failures start before the turf ever shows up. A yard looks fine on demo day, then August heat bakes the surface, clay shifts after a storm, and every shortcut under the turf starts showing through. The long-term result depends on how cleanly the old surface is removed and how well the new base is built.
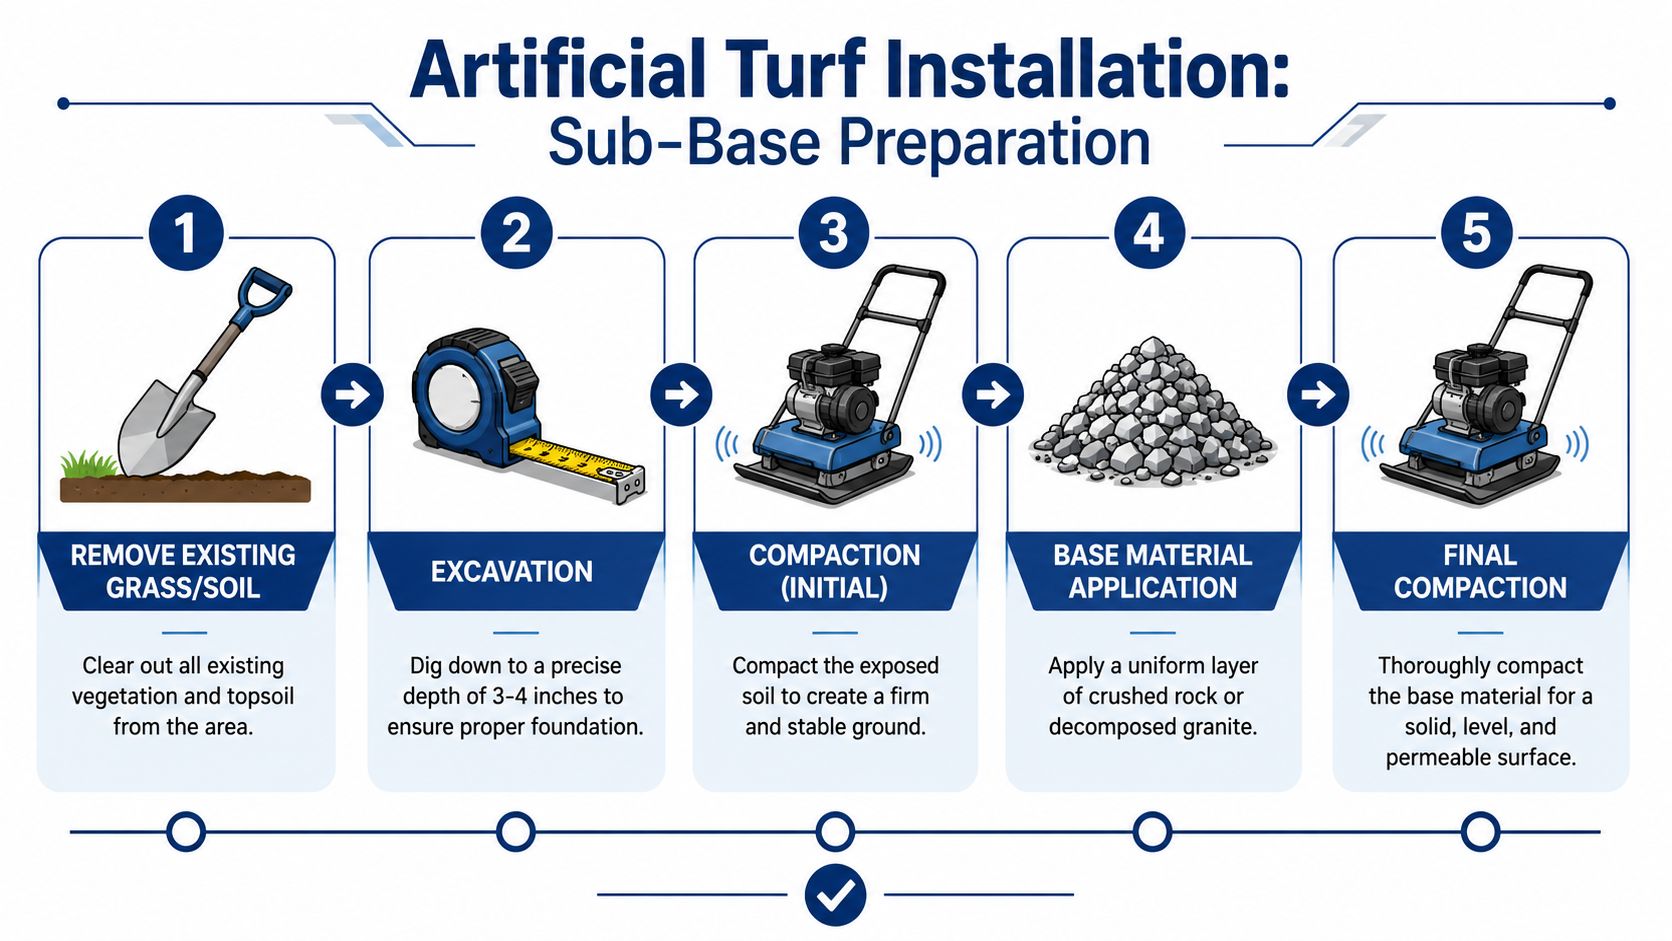
Remove grass, roots, and soft soil
The old lawn has to come out fully. That includes sod, roots, loose topsoil, mulch drift, and any organic material that will break down later. If it stays, it settles. In North Texas, that movement gets worse because expansive clay already swells when wet and shrinks when it dries.
For most residential installs, we excavate enough to remove unstable material and make room for a true aggregate base. The exact depth depends on the yard, the soil condition, and whether the area borders concrete, fencing, or a pool deck. A shallow skim cut usually creates more problems than it solves.
Cut the grade with drainage in mind
Excavation sets the shape of the finished lawn. If the subgrade holds water, the turf above it will hold the evidence. Low pockets near fence lines, dead-flat sections beside patios, and edges that trap runoff all turn into puddles or soft spots after rain.
In DFW, the goal is usually a controlled fall away from the house with no random dips in the field area. That sounds simple, but clay lots make it tricky. The soil can look smooth during excavation and still dry back unevenly a week later if the base work is rushed.
What we look for on site:
- Consistent slope away from foundations and structures
- Smooth transitions at sidewalks, curbs, pavers, and edging
- No shallow bowls where runoff can stall
- Clean perimeter depth so edges stay supported
Use weed barrier for separation, not correction
Weed fabric has a job, but it does not fix a poorly prepared base. It works best over a clean, shaped surface where the major grading and cleanup are already done. Installed that way, it helps separate layers and reduces growth pushing up from below.
If roots, ruts, or soft soil are left in place, fabric just covers the mistake.
Build the base with material that compacts tightly
Native clay is a poor finish layer under synthetic turf. It holds moisture, shifts with weather, and turns hard as brick in summer. A compactable aggregate such as crushed stone fines or decomposed granite gives the installation a more stable platform and better drainage response.
This is also where trade-offs matter. Decomposed granite can grade nicely for detail work, but some sites do better with crushed aggregate that locks together harder under compaction. The right choice depends on the yard, expected traffic, and how much water the area has to shed during heavy storms.
Handle edge support and runoff before they become repair issues
Edges fail first when the base is weak or water keeps washing material away. That is common on sloped side yards, dog runs, and fence lines where concentrated runoff cuts under the perimeter. On those properties, base prep and runoff control have to be planned together.
If the yard already loses soil during storms, erosion control solutions for sloped or washed-out areas may need to be addressed as part of the same project. Treating them separately often leads to rework.
At Rosewood Group, this is the point where we slow down and check the excavation, not speed up. Homeowners see turf at the end. Installers live with the consequences of what gets buried under it.
Compaction Leveling and Turf Layout
A turf base should feel more like a prepared pad than a garden bed. If it's soft underfoot before the turf goes down, it's going to move later. This stage is where patience matters, because small misses here become obvious once sunlight hits the finished lawn.
Compact the base until it behaves like a surface
For a high-quality install, a compacted 2 to 3 inch sub-base of crushed stone or decomposed granite is critical, and some guides specify 80 to 90% compaction while recommending wetting the base beforehand to improve stability, according to Synthetic Grass Warehouse's installation guide. In North Texas, that matters even more because expansive clay underneath will exploit any weak, inconsistent spots in the layer above.
A plate compactor is the right tool here. Hand tampers have their place on tiny touch-up areas, but they don't give a broad lawn the density it needs. Lightly wetting the aggregate before compaction can help the material settle and knit together more effectively, especially when conditions are dry and hot.
Check flatness, not just firmness
A compact base can still be wrong if it isn't level in the way the site needs. Flat doesn't mean perfectly horizontal. It means the surface is smooth, intentional, and free of random rises and low spots.
Use a long screed board, straight board, or level to read the surface across multiple directions. Look across the yard at a low angle, especially in strong afternoon light. Sunlight exposes flaws fast.
A quick field check:
| What you see | What it usually means |
|---|---|
| Rippled appearance | Base wasn't graded evenly before final compaction |
| Soft heel marks | Material is still loose in that area |
| Shallow depressions | Low spots need fill and re-compaction |
| Edges higher than center | Perimeter build-up will show after turf is secured |
Let the turf relax before final fitting
Once the base is right, roll the turf out and give it time to settle. One installation guide recommends leaving turf to acclimate for 24 hours after unrolling so the backing relaxes and lies flatter. That same guidance also stresses orienting turf fibers in the same direction so the finished lawn reads as one consistent surface, not a patchwork.
Those details sound minor until you ignore them. Turf laid straight from a tight roll can hold memory in the backing. Turf laid with opposing grain directions can look like two different colors even when it's the same product.
If one roll faces a different direction than the next, the seam may be technically closed and still look wrong from the patio.
Lay out for the best visual result
This part is half technical and half aesthetic. Start by deciding where seams will be least noticeable. Long, clean runs usually disappear better than short pieced-in sections. Keep cuts efficient around curves, but don't sacrifice grain direction just to save a little material.
What usually works best in DFW backyards:
- Seams away from the main sightline from windows and outdoor living areas
- Full-width coverage in high-visibility zones
- Consistent pile direction across every panel
- Extra care around hardscape edges where gaps or crooked cuts are easy to spot
At this point, the install should already look like a lawn before it's even secured. If it looks wrinkled, crooked, or uneven now, it won't improve after fastening.
Seaming Securing and Adding Infill
Professional-looking turf differentiates itself from a lawn that always looks installed. Seams, perimeter fastening, and infill are finish details, but they also affect durability. In DFW heat, weak finishing work gets exposed quickly.
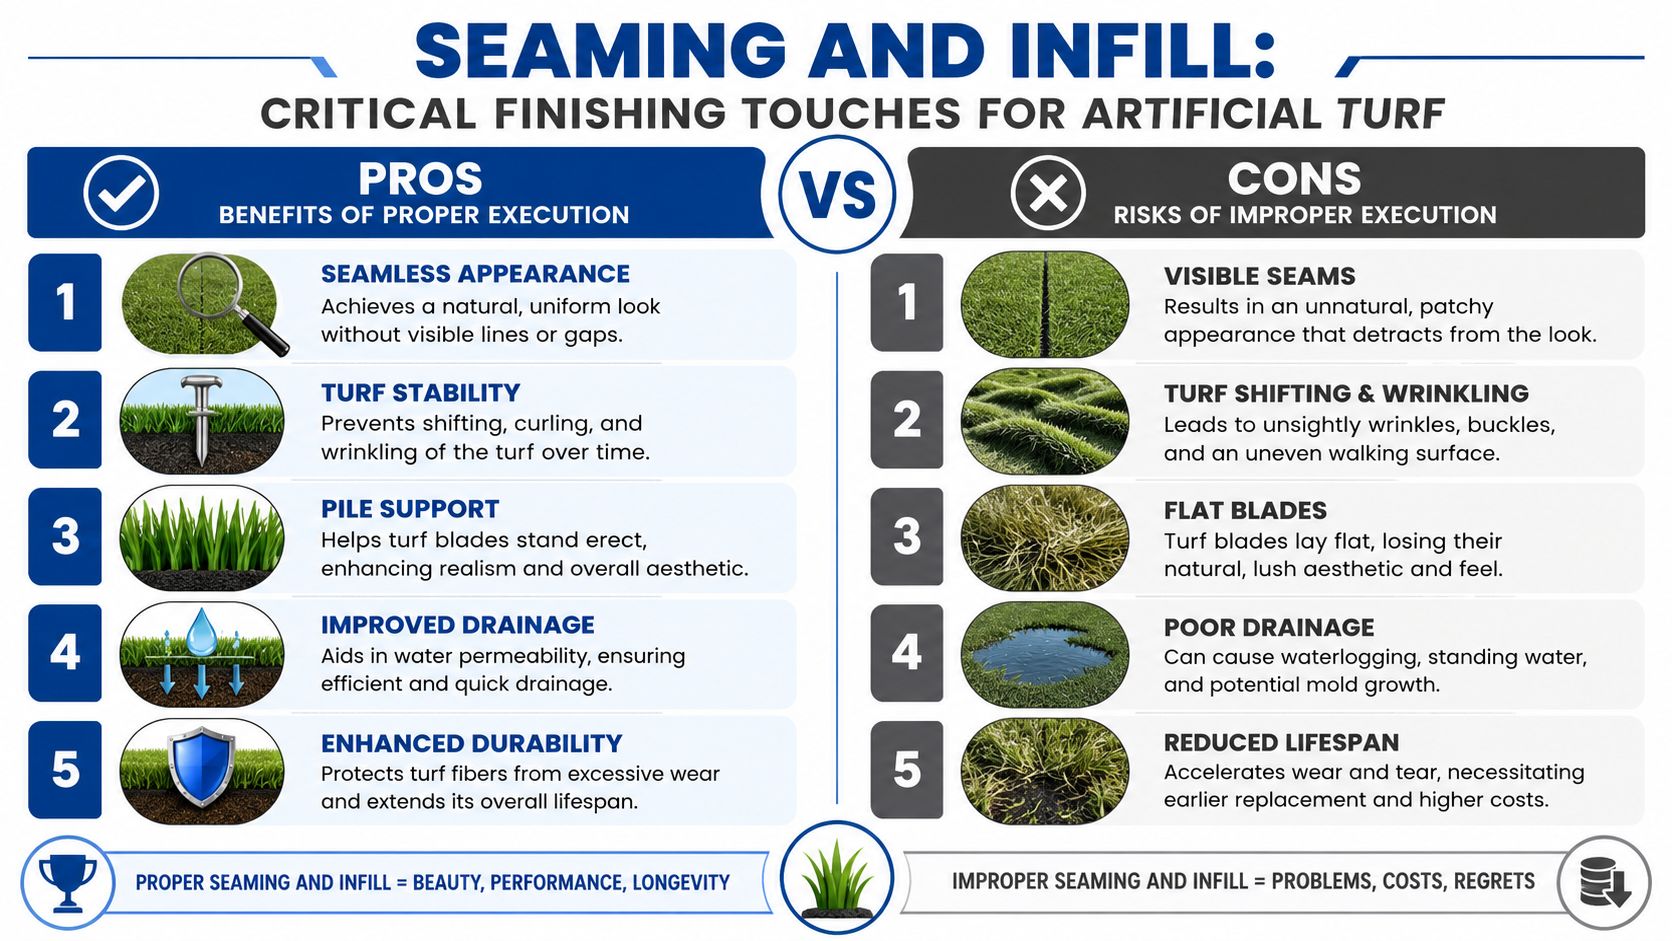
Build seams that disappear
Good seams start before adhesive comes out. The factory edges often need trimming so the stitch rows meet cleanly without a bulky gap or an overlapped ridge. Set the pieces in place, check the grain direction, and make sure the turf fibers all run the same way before joining anything.
Published guidance for the finish phase advises installers to orient fibers in the same direction, leave turf to acclimate for up to 24 hours after unrolling, and apply infill evenly in layers, often at 1 to 2 pounds per square foot, brushing it in thoroughly, as noted in this installation guidance video. Even if you never install turf yourself, those benchmarks help you judge whether the process on your property looks careful or rushed.
A clean seam usually comes from three habits:
- Precise trimming so stitch rows align naturally
- Stable positioning before adhesive is set
- No forcing pieces together to hide bad layout decisions
Secure the perimeter so heat doesn't win
North Texas sun expands materials, and foot traffic tugs at edges more than homeowners expect. That's why perimeter fastening matters. Turf that isn't restrained well can curl, lift, or shift along sidewalks, bed lines, and fence runs.
This is also where edge design matters aesthetically. Turf looks cleaner when it transitions intentionally into steel edging, concrete, pavers, or a crisp bed border instead of fading into loose mulch or soil. If you're still deciding how to finish those transitions, looking at different landscape edging options can help you avoid an otherwise solid install ending with a weak perimeter detail.
Add infill in controlled passes
Infill supports the blades, adds ballast, and improves the finished look when applied correctly. Dumping it all at once is the mistake most likely to create uneven areas. Spread it in light passes, then brush it down into the turf before adding more.
A practical sequence looks like this:
- Start with dry turf. Wet fibers don't brush and separate as cleanly.
- Use a spreader when possible. Even coverage is easier to control.
- Brush between passes. A stiff broom or power broom helps the infill settle lower in the pile.
- Check low areas from several angles. Uneven infill shows up differently in morning and afternoon light.
The lawn shouldn't look dusted on top. The infill should settle into the fiber structure and support it from below.
When seams are clean, edges are secure, and infill is worked in properly, the turf stops looking like a product roll and starts reading like a finished outdoor surface.
Finishing Touches and When to Call a Pro
The last pass on a turf install tells you a lot about the quality of the work before it. If the base is right, the seams are clean, and the infill was applied evenly, final grooming makes the lawn look full and settled. If those earlier steps were sloppy, grooming won't hide much.
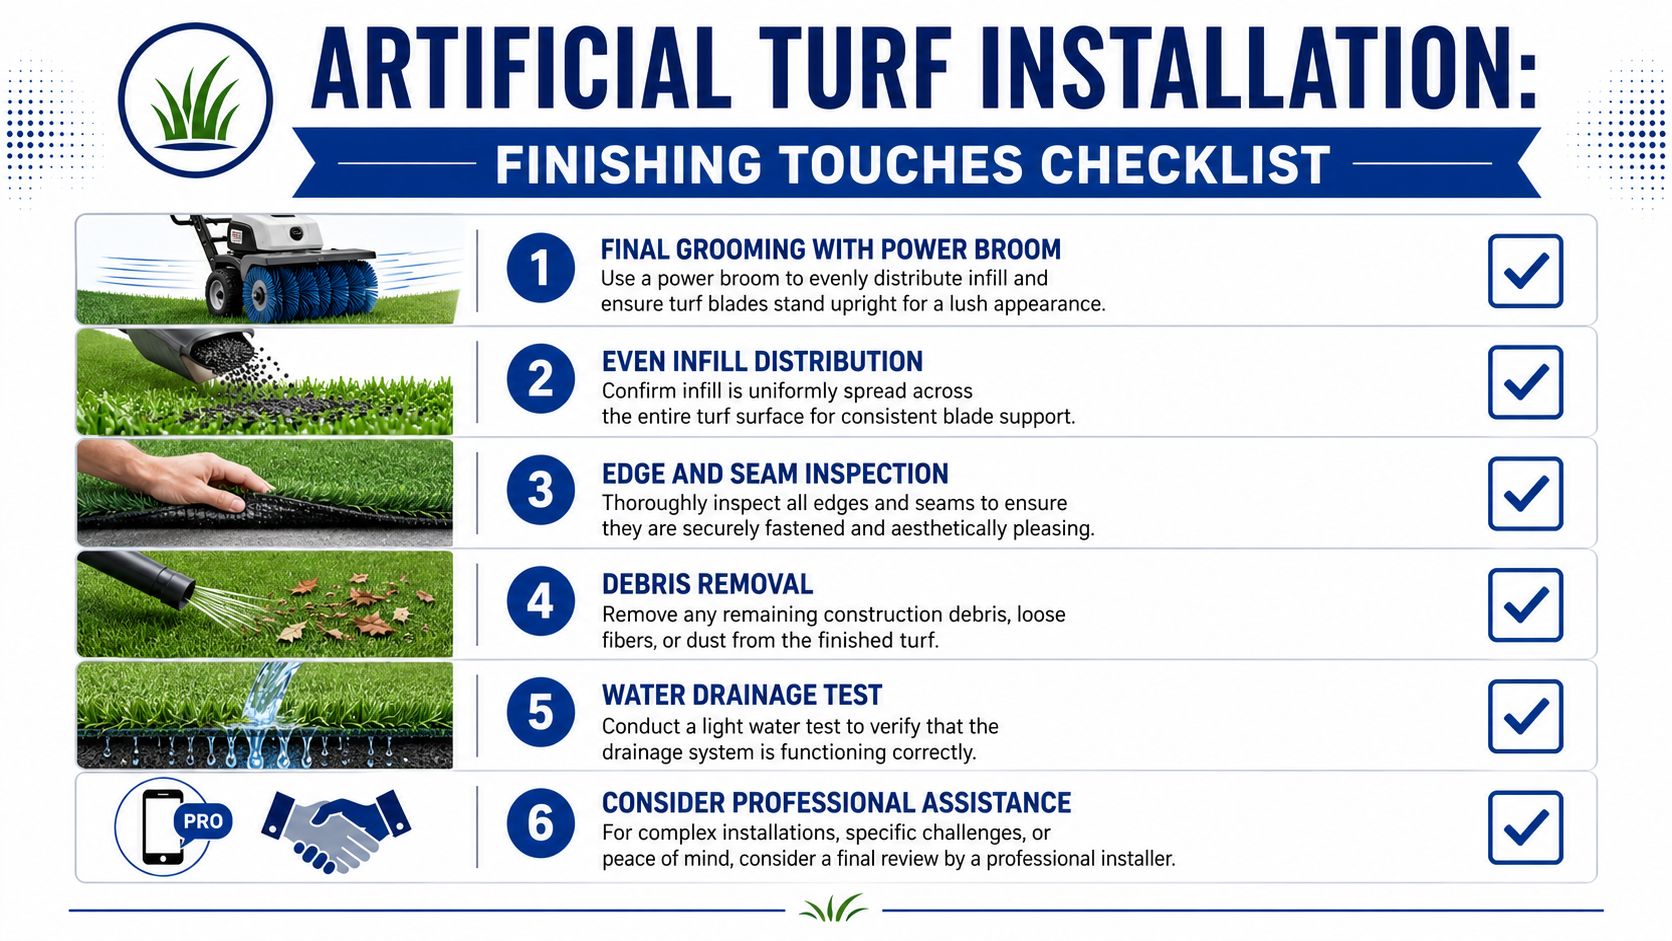
Final grooming and inspection
A stiff broom or power broom lifts the fibers and helps distribute infill uniformly across the surface. It also exposes finish issues that are easy to miss while you're still focused on installation. Look closely at seams, corners, drain paths, and any point where turf meets hardscape.
A key finishing step is securing the perimeter with 6-inch galvanized nails or stakes placed every 3 to 6 inches to prevent edge lift, according to Lowe's artificial grass installation guide. That fastening pattern is one of the clearest differences between a durable installation and one that starts loosening around the edges.
The common failures show up in a pattern
Most bad installs don't fail in creative ways. They fail in familiar ones. You can usually trace the problem back to one of a handful of shortcuts.
The biggest offenders:
- Too little excavation leaves no room for a real base
- Weak compaction creates dips, wrinkles, and soft spots later
- Poor seam alignment leaves visible joins across the lawn
- Loose edge fastening lets corners and perimeters creep upward
- Rushed finishing leaves the turf matted and uneven
That's the rogue's gallery homeowners end up seeing after the honeymoon phase. The lawn may still be usable, but it won't have that clean, intentional look people expect from turf.
Know when the project has outgrown DIY
Some yards are straightforward. Others involve drainage issues, slope changes, narrow access, tree roots, utility conflicts, or HOA constraints that make the install much harder than it first appears.
A professional install makes more sense when:
| Situation | Why it changes the job |
|---|---|
| Clay-heavy yard with drainage issues | Base prep and grading become more technical |
| Tight access | Material handling and soil removal get harder fast |
| Multiple curves or hardscape transitions | Cutting and seaming require more finish skill |
| Large visible lawn | Mistakes in flatness and grain direction stand out more |
If you're comfortable managing demolition, equipment rental, soil disposal, seam adhesive, and fine finish work, DIY can be viable on a simple area. If not, it's worth bringing in an installer before a small lawn project turns into a surface you keep noticing for the wrong reasons.
DFW Artificial Turf Installation FAQs
How deep should the area be excavated for turf?
Depth is set by the finished height you need, not by one fixed number. In Dallas-Fort Worth, that usually means removing enough soil to install a compacted base and still have the turf finish cleanly against patios, sidewalks, pool coping, or edging.
On expansive clay, shallow excavation is where trouble starts. If there is not enough room for a stable base, the surface is more likely to dip, hold water, or sit proud of nearby hard surfaces after a hot summer and a wet season.
What base material is usually used under artificial turf?
Crushed aggregate is the standard choice because it drains well and compacts into a stable platform. The exact blend can vary by yard, especially in North Texas where some sites need better drainage performance and others need a tighter finish near concrete or pavers.
The bigger issue is matching the base to the soil and use case. A backyard putting green, a pet run, and a front yard showpiece do not all get built the same way.
Does turf need time to sit out before it's installed?
Yes. Letting the rolls relax after unrolling helps the backing flatten out, which makes layout, trimming, and seam work cleaner.
In DFW summer heat, that step matters even more. Turf can soften and shift quickly in the sun, so timing the layout matters. We usually want enough time for the material to relax, but not so much that it gets harder to handle precisely.
How important is compaction in DFW soil?
Compaction decides whether the lawn stays flat. North Texas clay expands, shrinks, and moves more than homeowners expect, especially after long dry stretches followed by heavy rain.
A base that is compacted evenly gives the turf a much better chance of holding grade and draining properly. If one area is tight and another is loose, the finished lawn will usually tell on you within a season.
How is the turf held in place at the edges?
Edges are secured with nails, spikes, or other anchoring methods suited to the perimeter detail. What matters is consistent fastening and a clean edge condition, especially around curves, gates, flower beds, and concrete transitions.
This is one of the first places a rushed install starts to show. Loose corners, wavy borders, and lifted edges are usually installation problems, not turf-product problems.
How much infill does artificial turf need?
The right amount depends on the turf product, blade height, and how the space will be used. Pet turf, play areas, and decorative front yards often call for different infill choices and application rates.
What homeowners should watch for is even coverage. Infill that is too light or spread unevenly leaves the surface patchy, reduces blade support, and can make the lawn feel hotter underfoot in full DFW sun.
What's the biggest mistake homeowners make on turf projects?
They treat turf like a surface-only upgrade. The essential work is below it. Grade correction, drainage, compaction, and edge detailing are what separate a lawn that still looks sharp after two Texas summers from one that starts looking tired in a few months.
City rules and HOA expectations can also trip people up. In some DFW neighborhoods, the material, edge detail, visibility from the street, or drainage impact can all come under review before installation starts.
If you're weighing a turf project for your Dallas-Fort Worth property and want a practical read on site prep, drainage, edging, or full installation, Rosewood Landscape Group handles artificial turf as part of broader property design and installation work across North Texas.
Related posts

How to Plan a Garden: DFW Guide to Lasting Beauty
Landscape Edging Options: A DFW Homeowner’s Guide 2026
Master Erosion Control Landscaping in DFW, 2026

Artificial Turf Installation Cost Per Square Foot: DFW 2026